Management and Maintenance
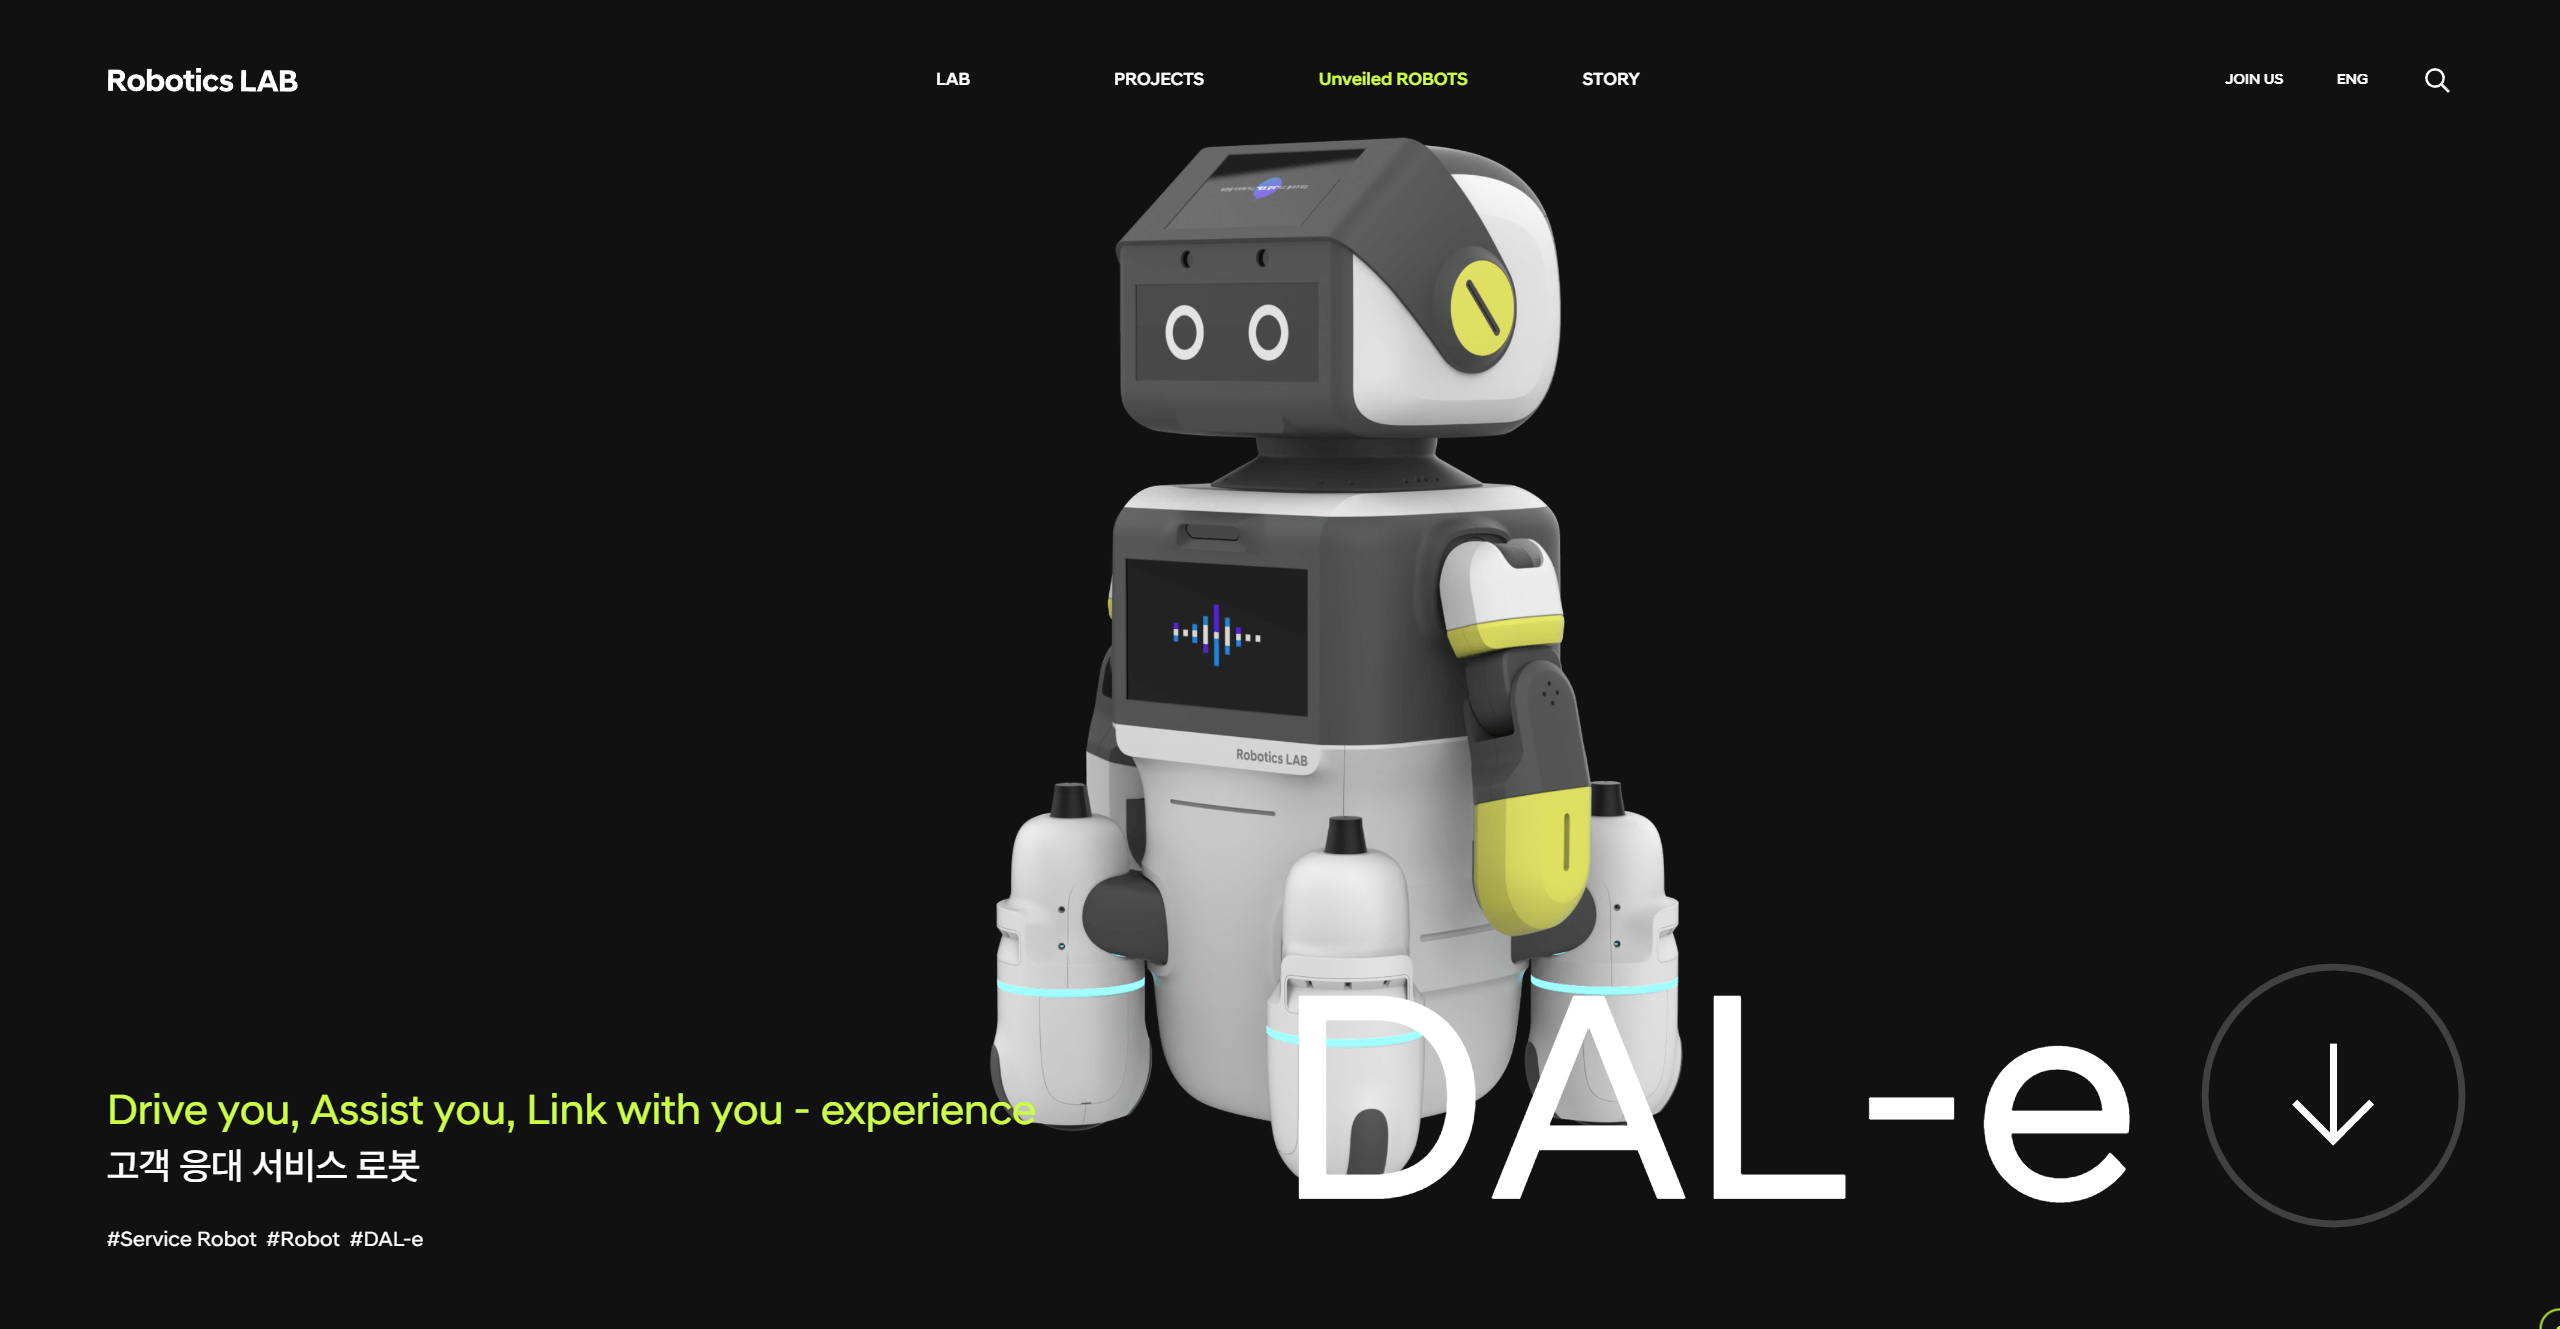
Product
Basic Operation
Management
Maintenance
Specifications
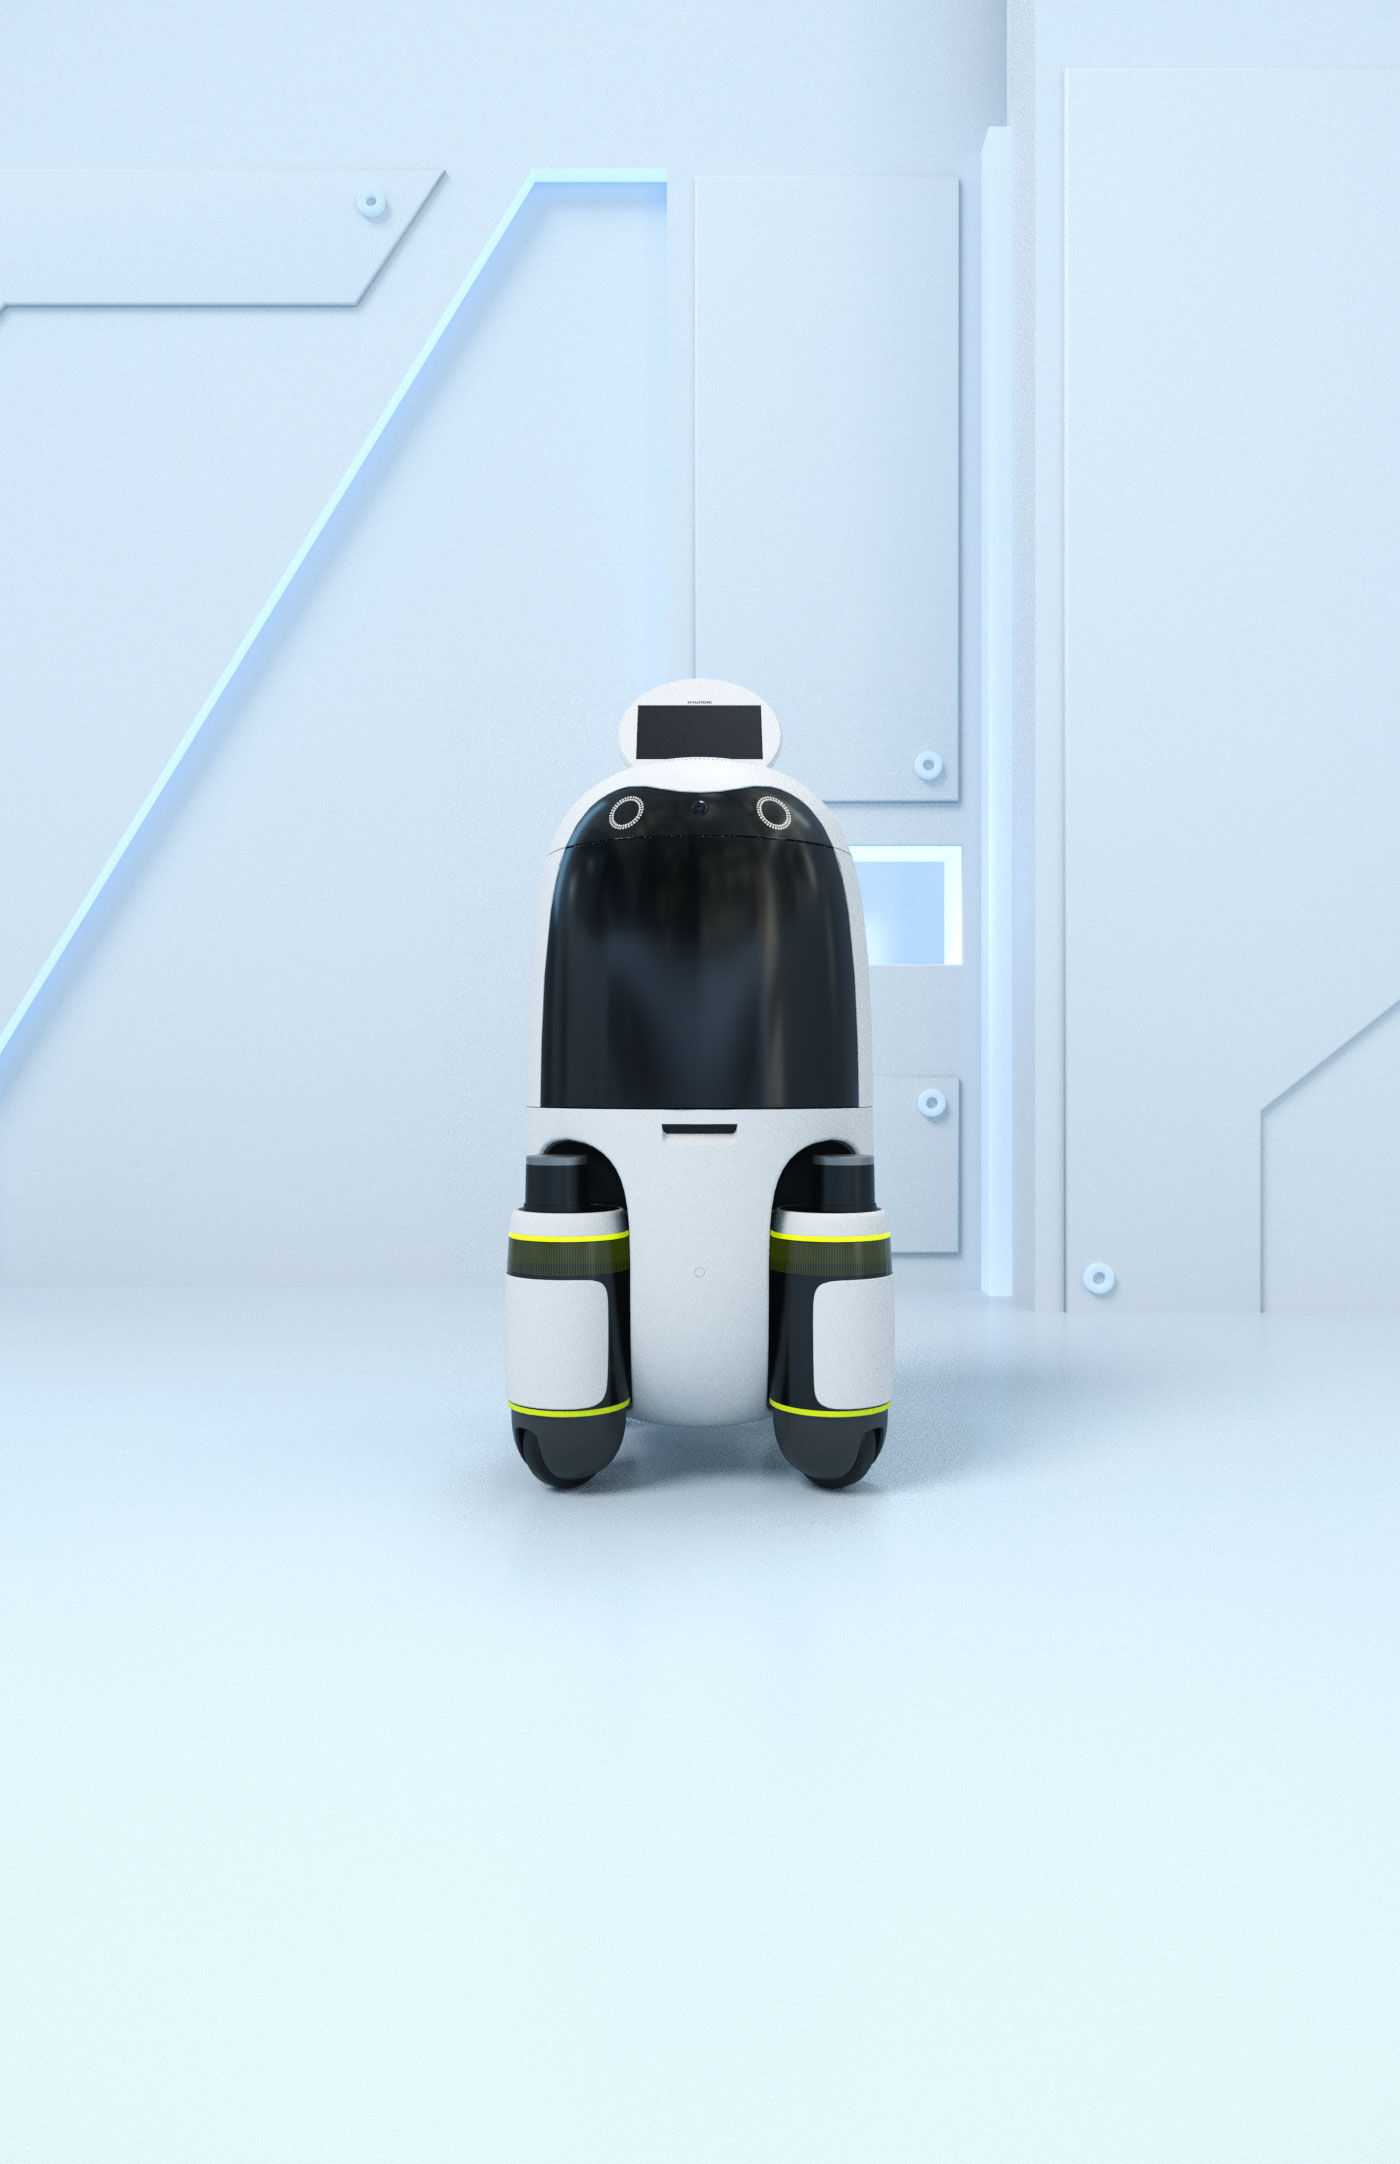
Components
The following components are provided with the purchase of the robot:
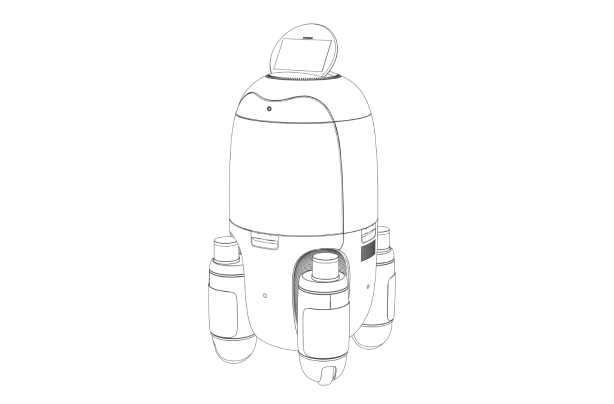
Service robot
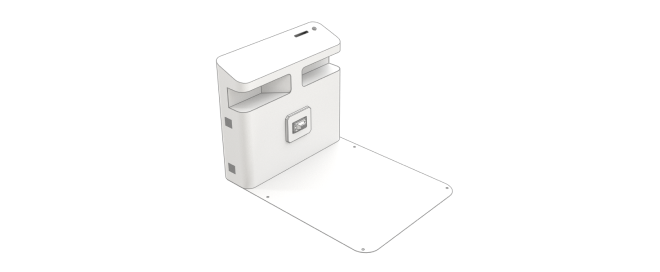
Charging station

Remote controller
Charger
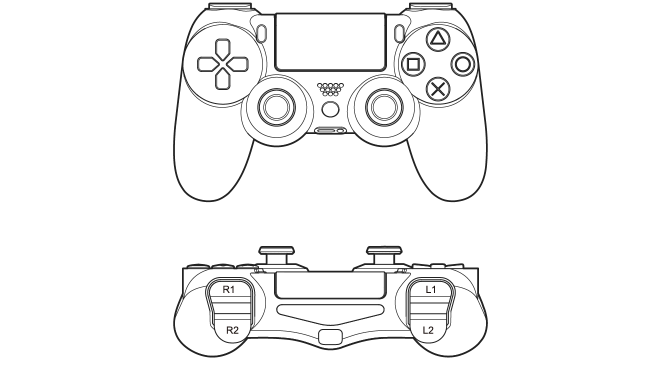
Controller (joystick)
Remote controller
After purchase, turn the robot system on and off. If necessary, the cargo box may be manually operated.

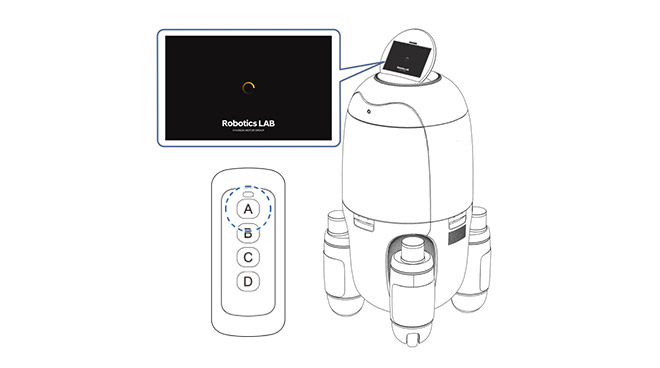
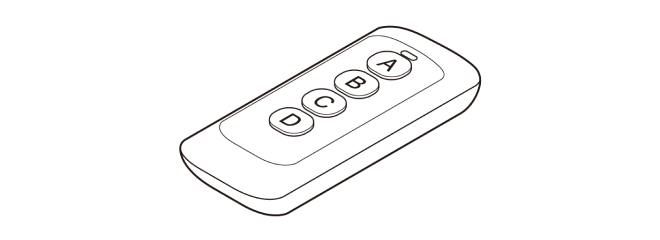
Main Parts of Remote Controller
Controller
You can directly control the robot’s movement using a joystick controller or through the control application from a tablet pc.
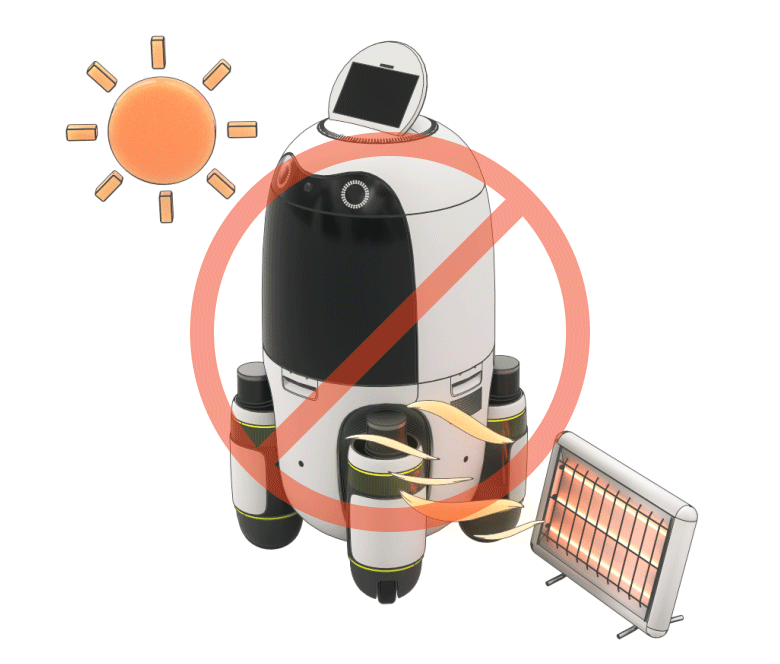
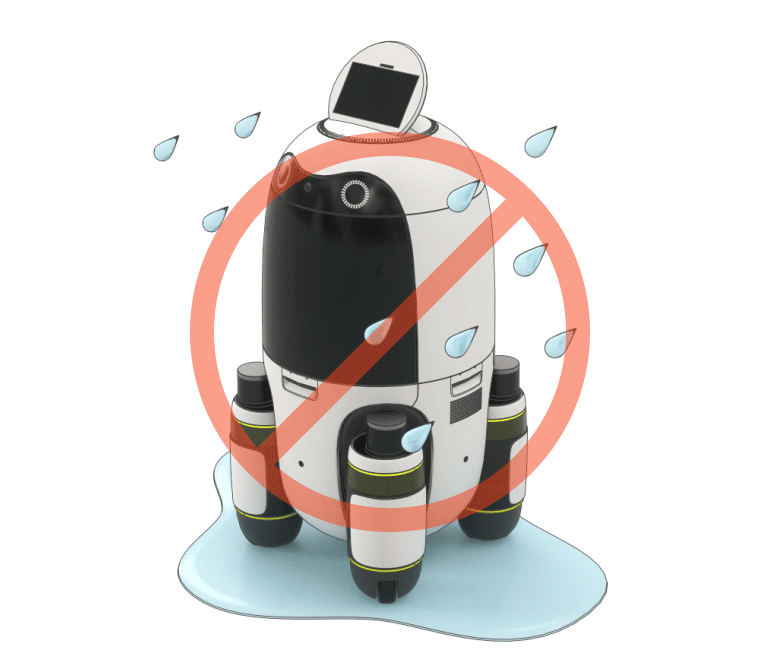
Use environment
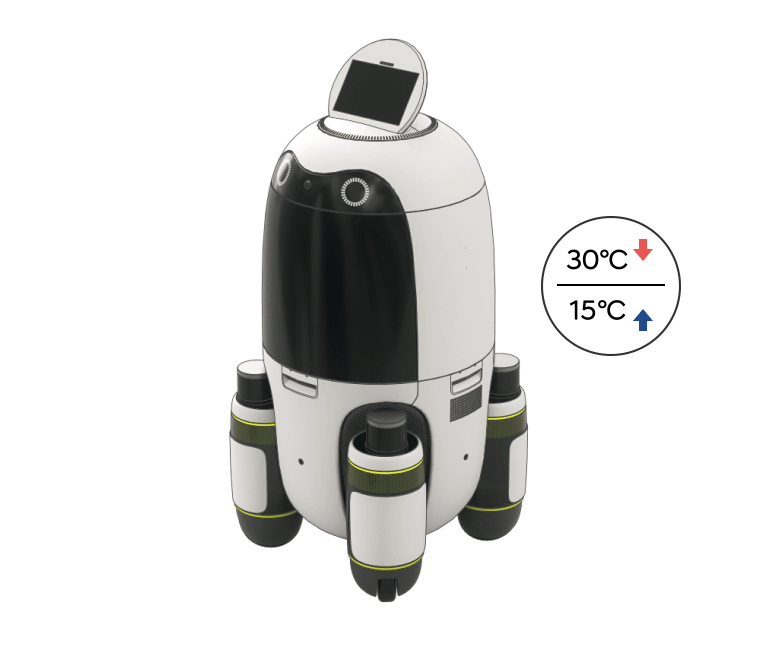
Please use the robot within a location with appropriate conditions.
1.
The appropriate temperature for operating the robot is between 15℃ - 30℃, and the appropriate humidity is between 40 - 60%.
2.
Use the robot within a well-ventilated indoor environment with no dampness.
3.
Use the robot at locations with flat, smooth floors with no vibrations or sudden impacts.
4.
Please do not use the robot at locations with slippery or soft floors as it may prevent normal movement.
5.
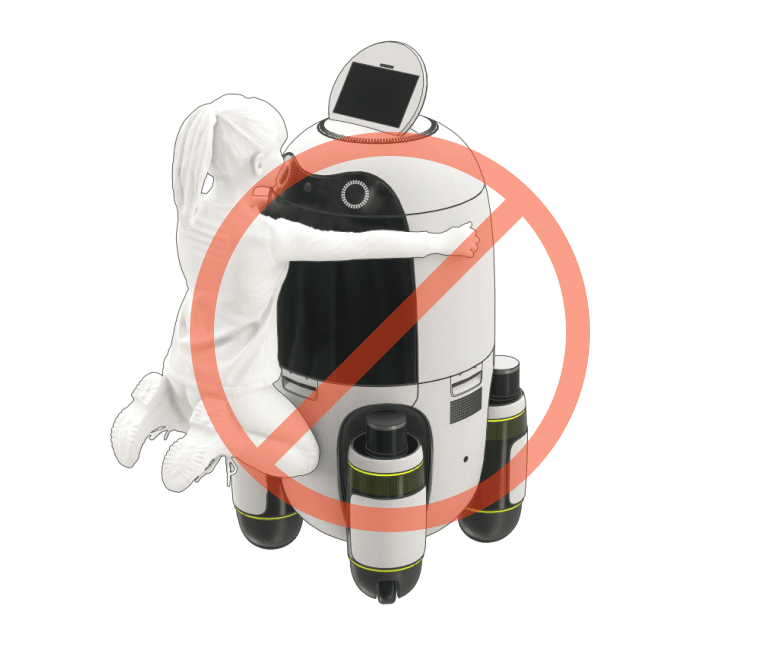
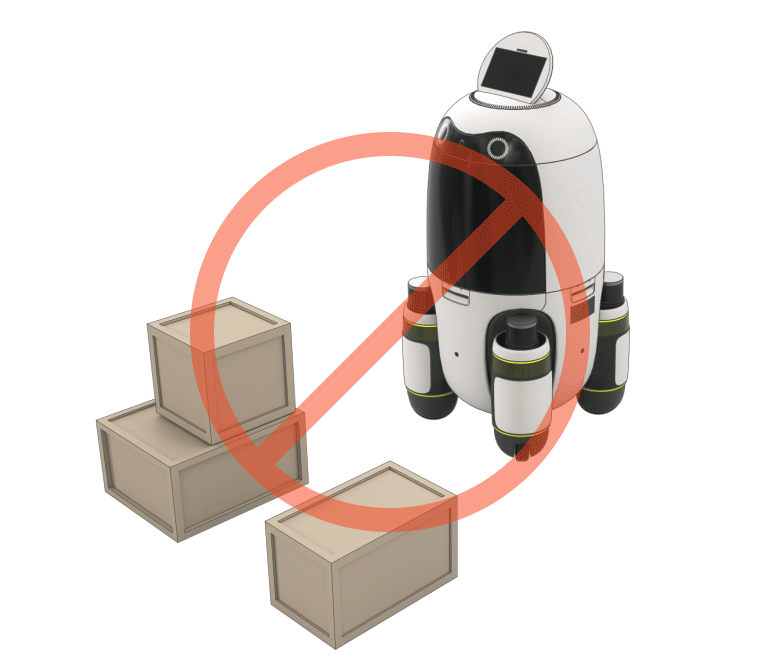
Please do not place any obstacles near the charging station or in the navigational path of the robot.
Turning on the robot
Turn on the robot system and enter the supervisor verification code to search for the robot's location.
1.
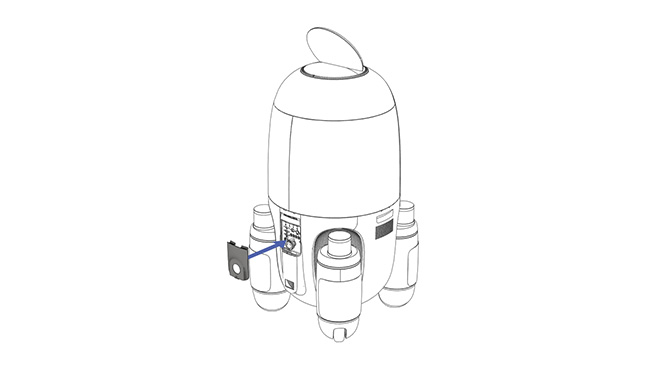
Use the gap on the back of the robot to remove the cover.
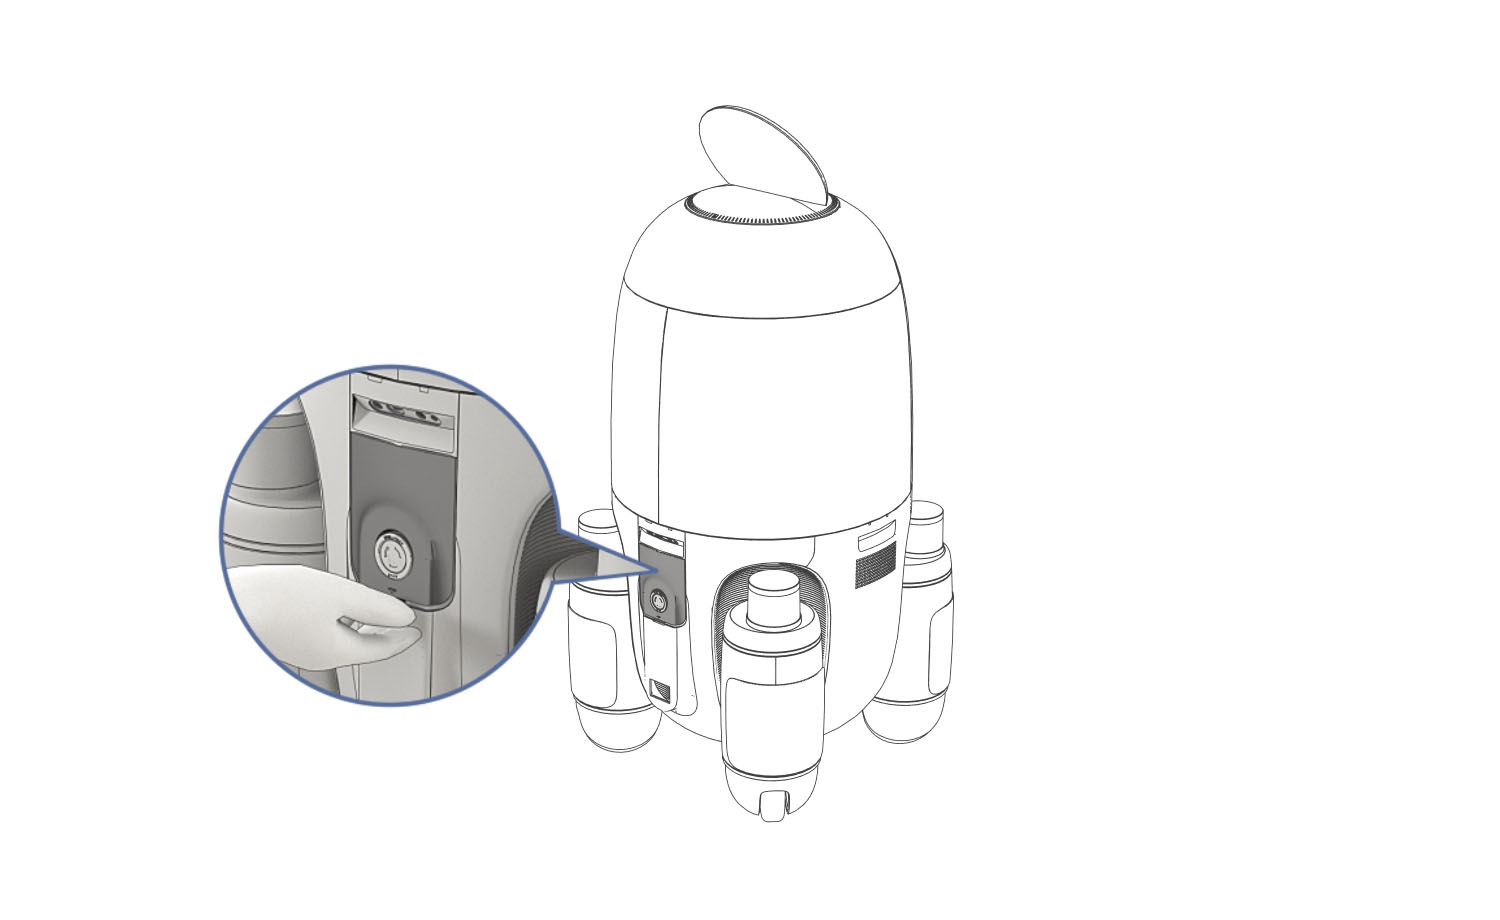
2.
Press the [Power] button on the control panel located behind the robot for 3 seconds. The status indicator will blink yellow.

3.
Place the cover back onto the back of the robot.
4.
Press the [A] button on the remote. As the robot system turns on, the boot screen will be displayed and the status indicator will turn blue.
Turning off the robot
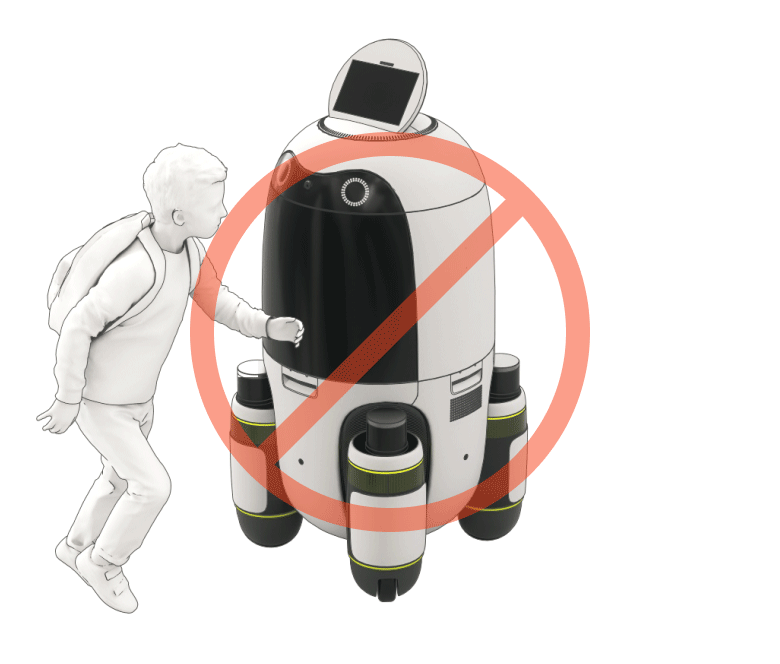
The robot must be approached only during its standby mode or when it has stopped all movement.
1.
Press the [Turn Off] button within the settings screen on the display.
2.
If the system cannot be turned off via the display, press the [B] button on the remote controller.

3.
Use the gap on the back of the robot to remove the cover.
4.
Press the [Power] button on the control panel located behind the robot for 3 seconds. The status indicator will turn off.
5.
Place the cover back onto the back of the robot.
Using the charging station
Place the charging station at an appropriate location and turn on the power. When the robot runs out of battery during its operation, it will automatically end its current service and search for the charging station for charging.
1.
If the robot is running low on battery, it will end its current service and navigate to a charging station.
2.
The status indicators of the charging station will turn blue when its batteries are charged, and the robot will automatically move to its designated standby location.

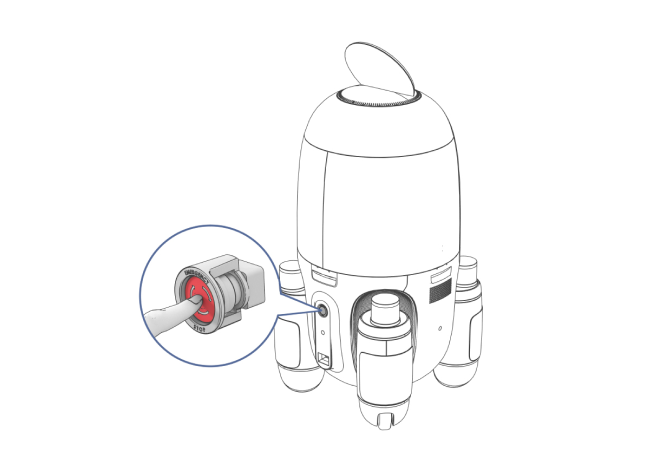
Emergency Stop Button Explanation
If operation needs to be suspended due to an emergency, press the Emergency Stop Button to stop the robot’s navigation.
1.
Press the Emergency Stop Button on the lower rear of the robot.
2.
When resetting, use the gap on the rear of the robot to remove the cover.
3.
Turn clockwise until the button returns to its original position.
4.
Place the cover back onto the rear of the robot.
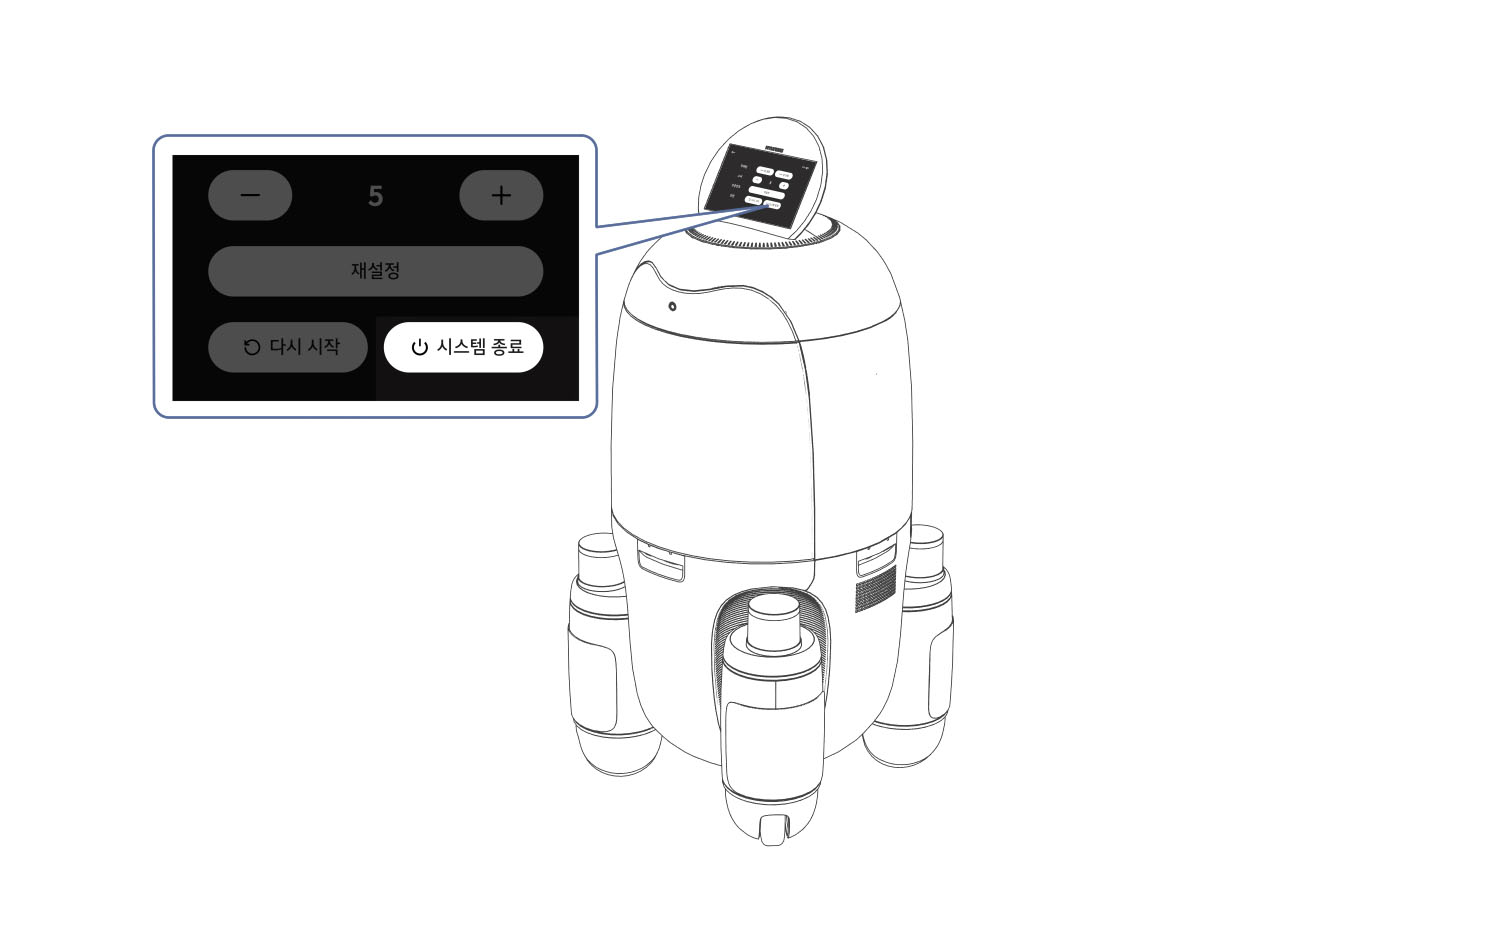
How to Reboot
If necessary, rebooting can be done through the display.
1.
Enter the hotel staff ID number to enter the settings screen.
2.
Press the [Restart] button to begin the reboot.

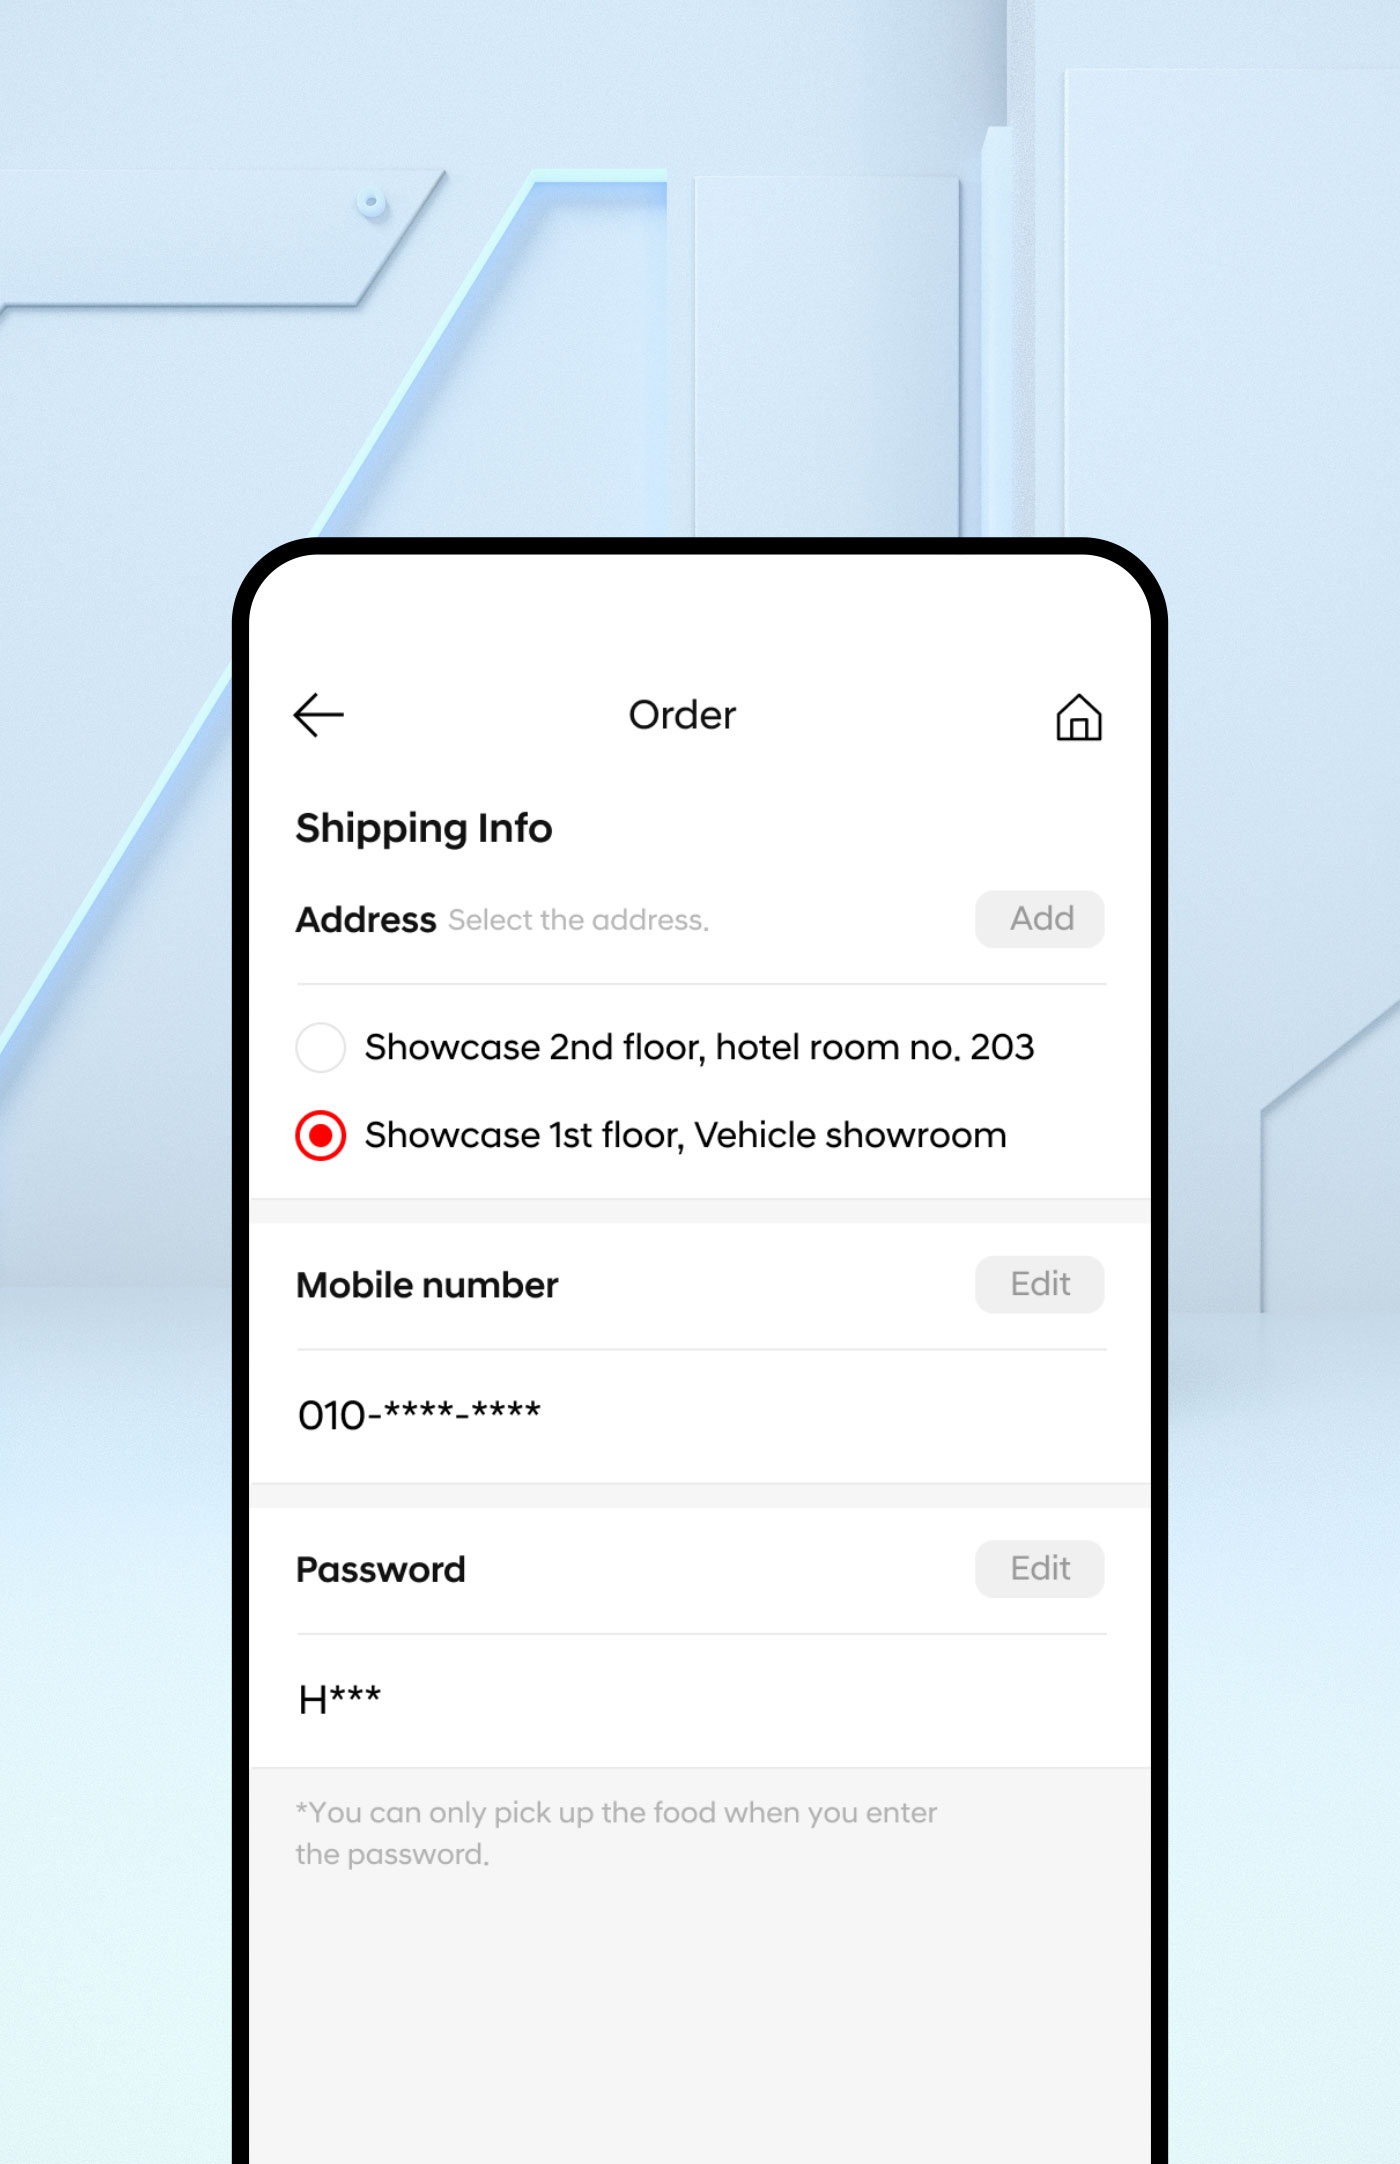
Control Page
Manage robots by viewing real-time locations of the robot, map, robot status information, order history, etc.
1.
Monitoring: The location of the robot, status (warning, stop, etc.), order management, etc. can be monitored in real-time.
2.
Order Management: Order details, delivery cancellation, order status, etc. of every order can be managed.
3.
Alarm Log Screen: Various error statuses and alarm logs such as network instability, opening of door, etc. can be viewed.
Managing the Robot
"Gently clean the dirtied surface with a dry cloth. Please clean the robot regularly as any contamination to the robot’s surface may affect its movement."
Managing the Robot System
Reboot the robot system if the robot doesn’t function properly or otherwise malfunctions.
Press the B button to exit the system, and press the A button to turn it back on. Please call the supervisor if the remote control does not function.
You can also refer to [How to Reboot] page to reboot using the display.
Update
Please do not update the robot on your own accord. Please share all abnormalities with the developers.
1.
If there are changes to the guide environment, the contents of the robot will be updated through remote or on-site operation.
2.
Robot software updates shall be performed occasionally by the development team as needed.
If robot is damaged
"If any damage is confirmed or suspected in all parts of the robot and charging station including the exterior, sensors, display, joint areas, motor, etc., immediately stop its operation and inspect the suspected parts and current status.
Afterward, contact the supervisor. Furthermore, do not attempt to discard any missing or detached parts or exterior of the product on your own accord; collect them to be given to the supervisor."
Transport method
When moving the robot, use the controller to drive the robot to the desired location. Alternatively, you may manually align the robot's wheels to the desired direction and push the robot to the desired location.
If transporting the robot outdoors, turn off the robot and use specialized transport vehicles and equipment to move the robot to the desired location.
Storage method
When storing the robot without the intention of usage, charge the battery before storing, with consideration of the following:
For long-term storage, please take safety measures against electrocution risks.
1.
Store the robot in a cool, dry place, and avoid any locations subject to frequent temperature and humidity fluctuations. The appropriate temperature for storing the robot is between 0 - 45℃, and the appropriate humidity is between 20 - 80%.
2.
When storing the robot using packaging materials, please use a desiccant.
3.
For long-term storage, please take safety measures against electrocution risks.
If errors occur
An error message will appear on the service screen if any problems occur with the robot. Contact the supervisor when, after all appropriate measures were taken according to the troubleshooting for each error message, the problem persists.
|
Classification
|
Error message
|
Troubleshooting
|
|
General
|
The delivery has been canceled due to a problem with the robot. Please restart the robot.
|
1. Reboot
2. If the same problem persists, please contact the supervisor.
|
|
Elevator
|
The robot is unable to (un)board the elevator. The robot needs assistance.
|
1. Manually operate the robot using the controller to move it out of the elevator.
2. Proceed the same as the [General] response.
|
|
Cargo Box
|
The cargo box door isn’t opening. The robot needs assistance.
|
1. Check the cargo box for any issues.
2. Proceed the same as the [General] response.
|
|
The robot cannot continue its service because its doors cannot be closed. The robot needs assistance.
|
1. Check inside the cargo box for any items requiring removal.
2. Press the “Close Door” button on the settings screen.
3. Proceed the same as the [General] response.
|
|
Item Retrieved
|
The delivery is being delayed. Please confirm.
|
1. Proceed with direct delivery
2. Proceed the same as the [General] response.
|
|
The robot cannot move as it has exceeded the designated estimated time of arrival. The robot needs assistance.
|
1. Contact the customer
2. Proceed the same as the [General] response.
|
|
The item cannot be delivered because there is no one in the room.
|